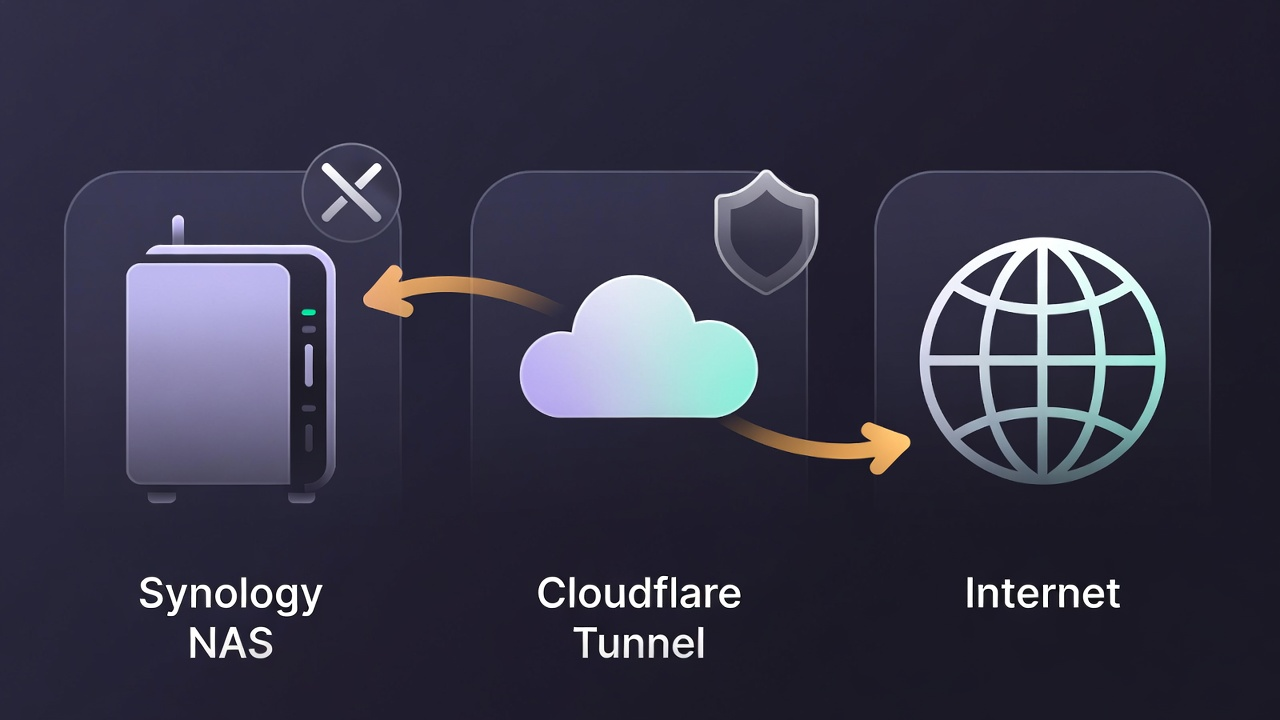
Connecting your Synology NAS to a Cloudflare Tunnel enables secure access to local services without opening router ports. By leveraging the Cloudflare Zero Trust ecosystem, you can route traffic through an encrypted tunnel, eliminating the need for complex firewall rules or traditional VPNs.
Prerequisites
- A Cloudflare account with a configured domain.
- A Synology NAS running DSM 7.2 or higher (required for Container Manager).
- Cloudflare Zero Trust enabled on your account.
Step-by-Step Configuration
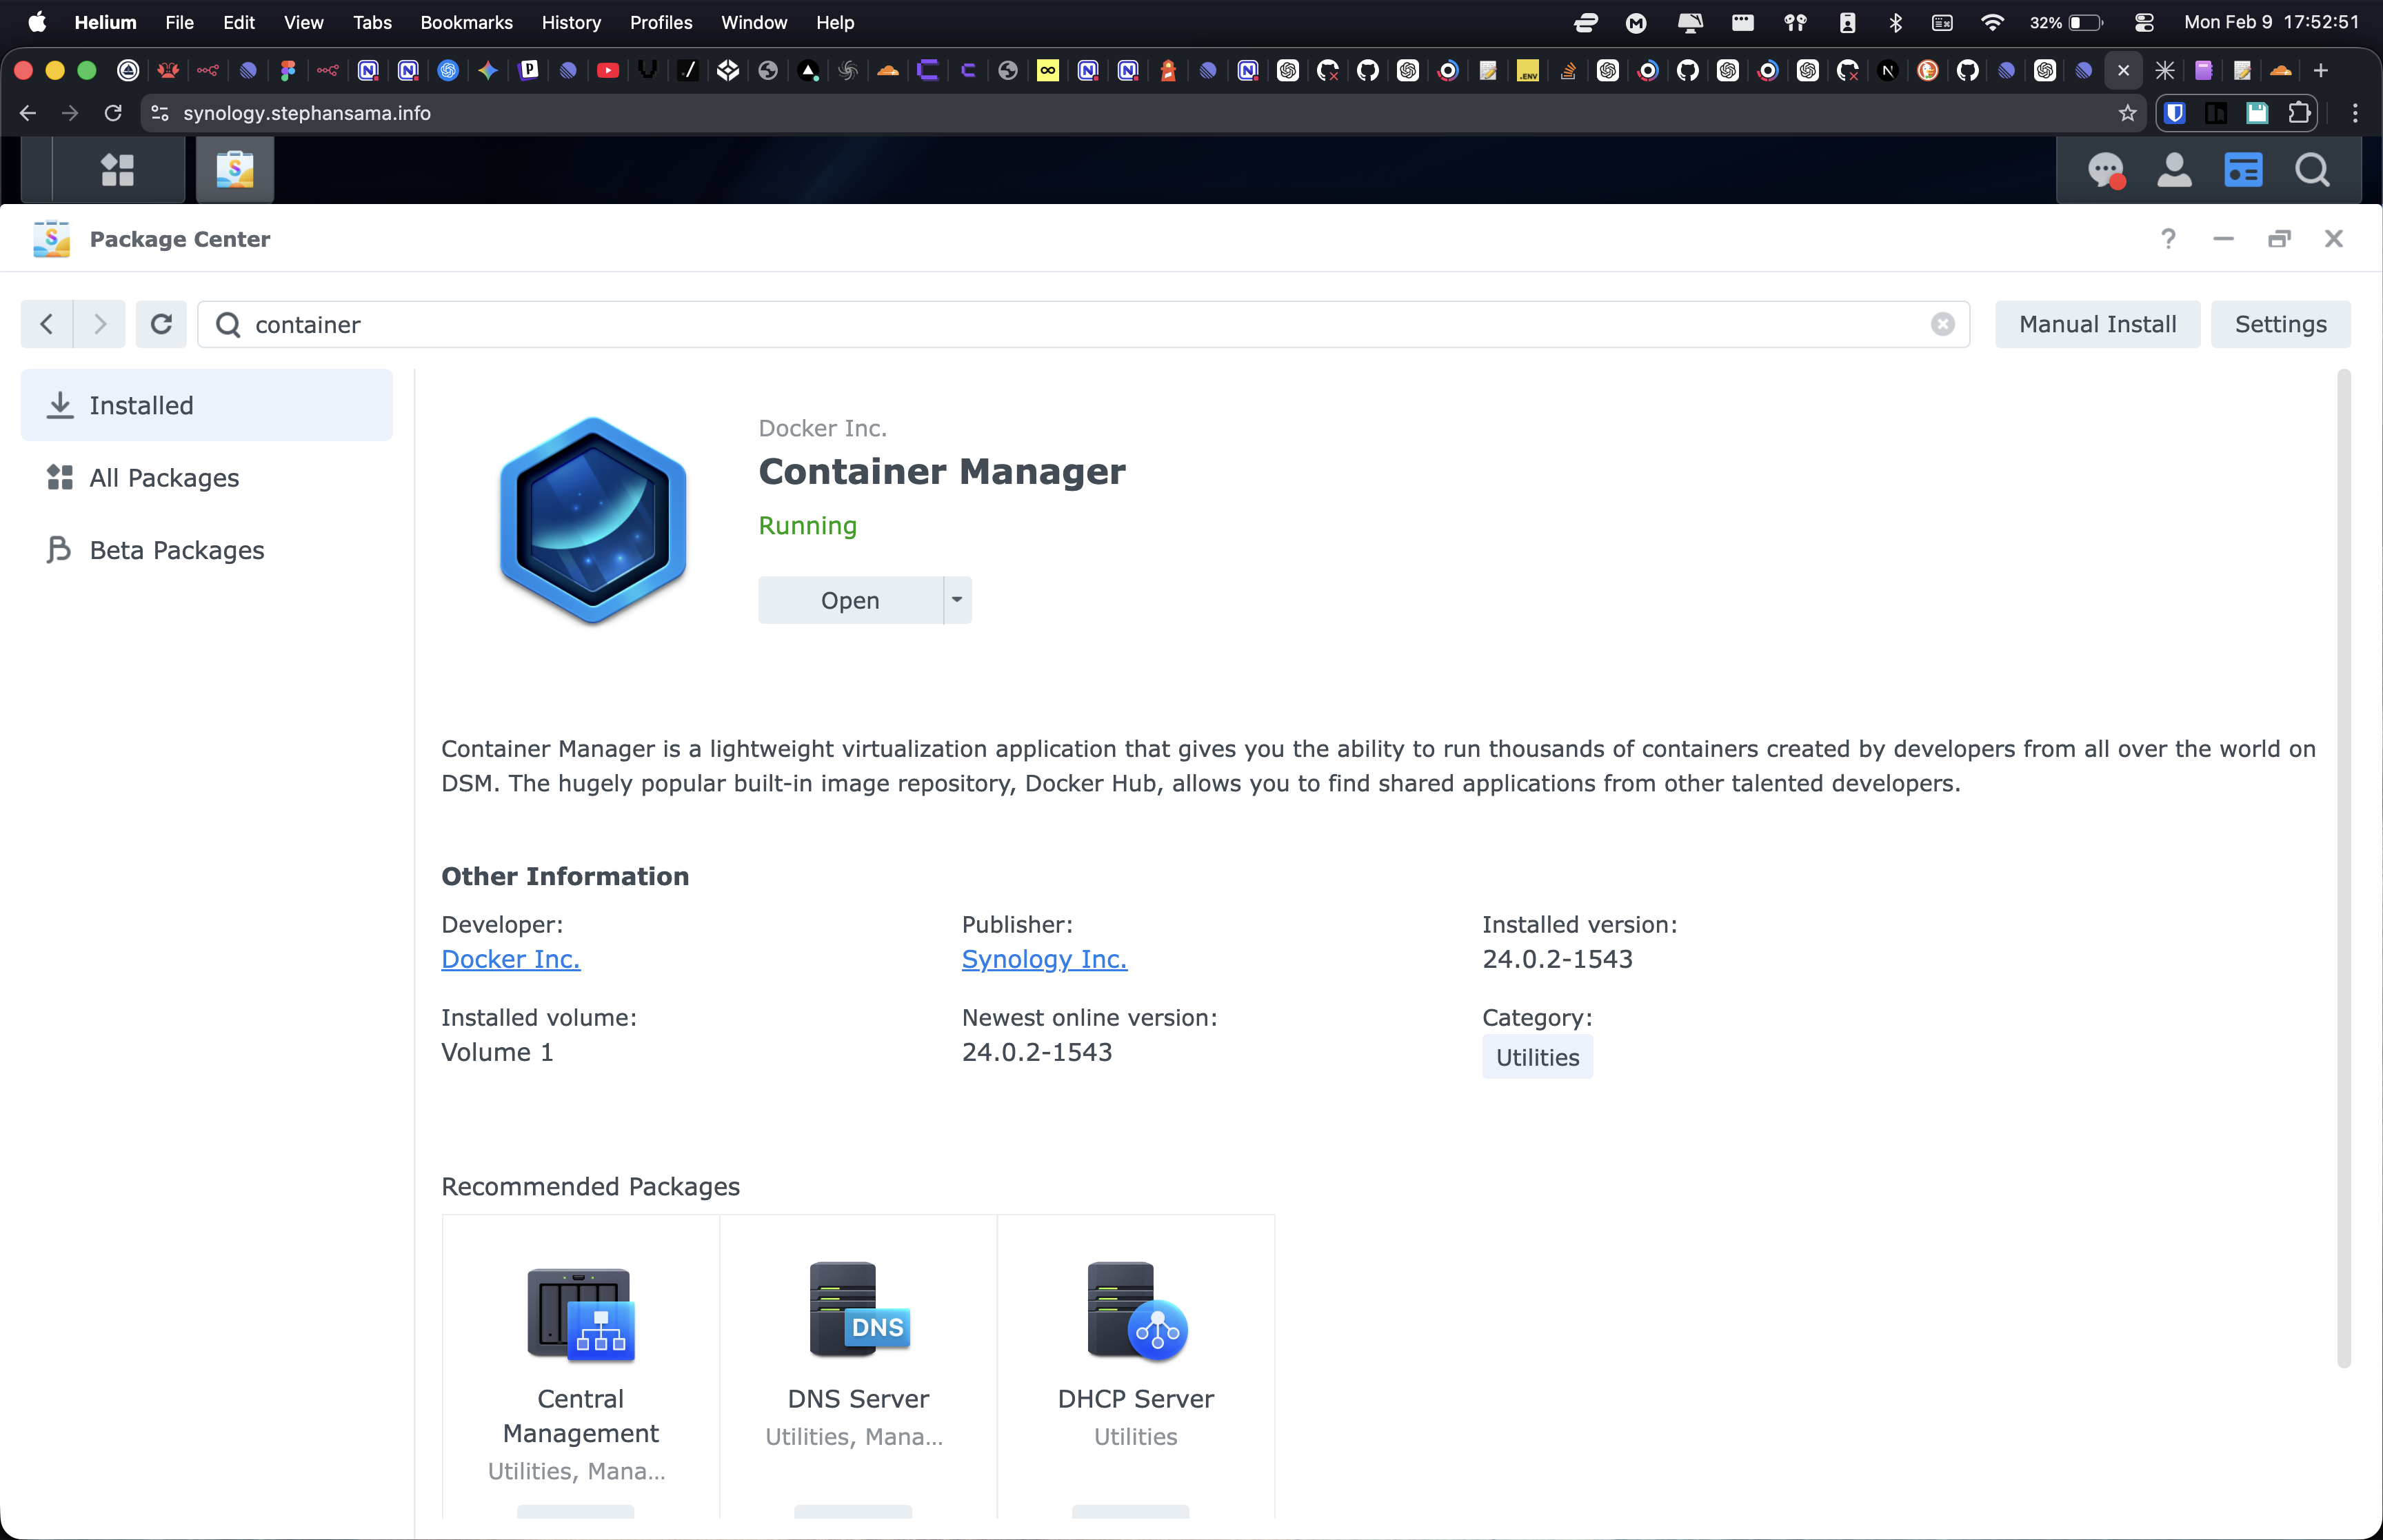
1. Install Container Manager
Log in to Synology DSM, open the Package Center, and search for Container Manager (formerly the Docker package). Click Install if the package is not currently active on your system.
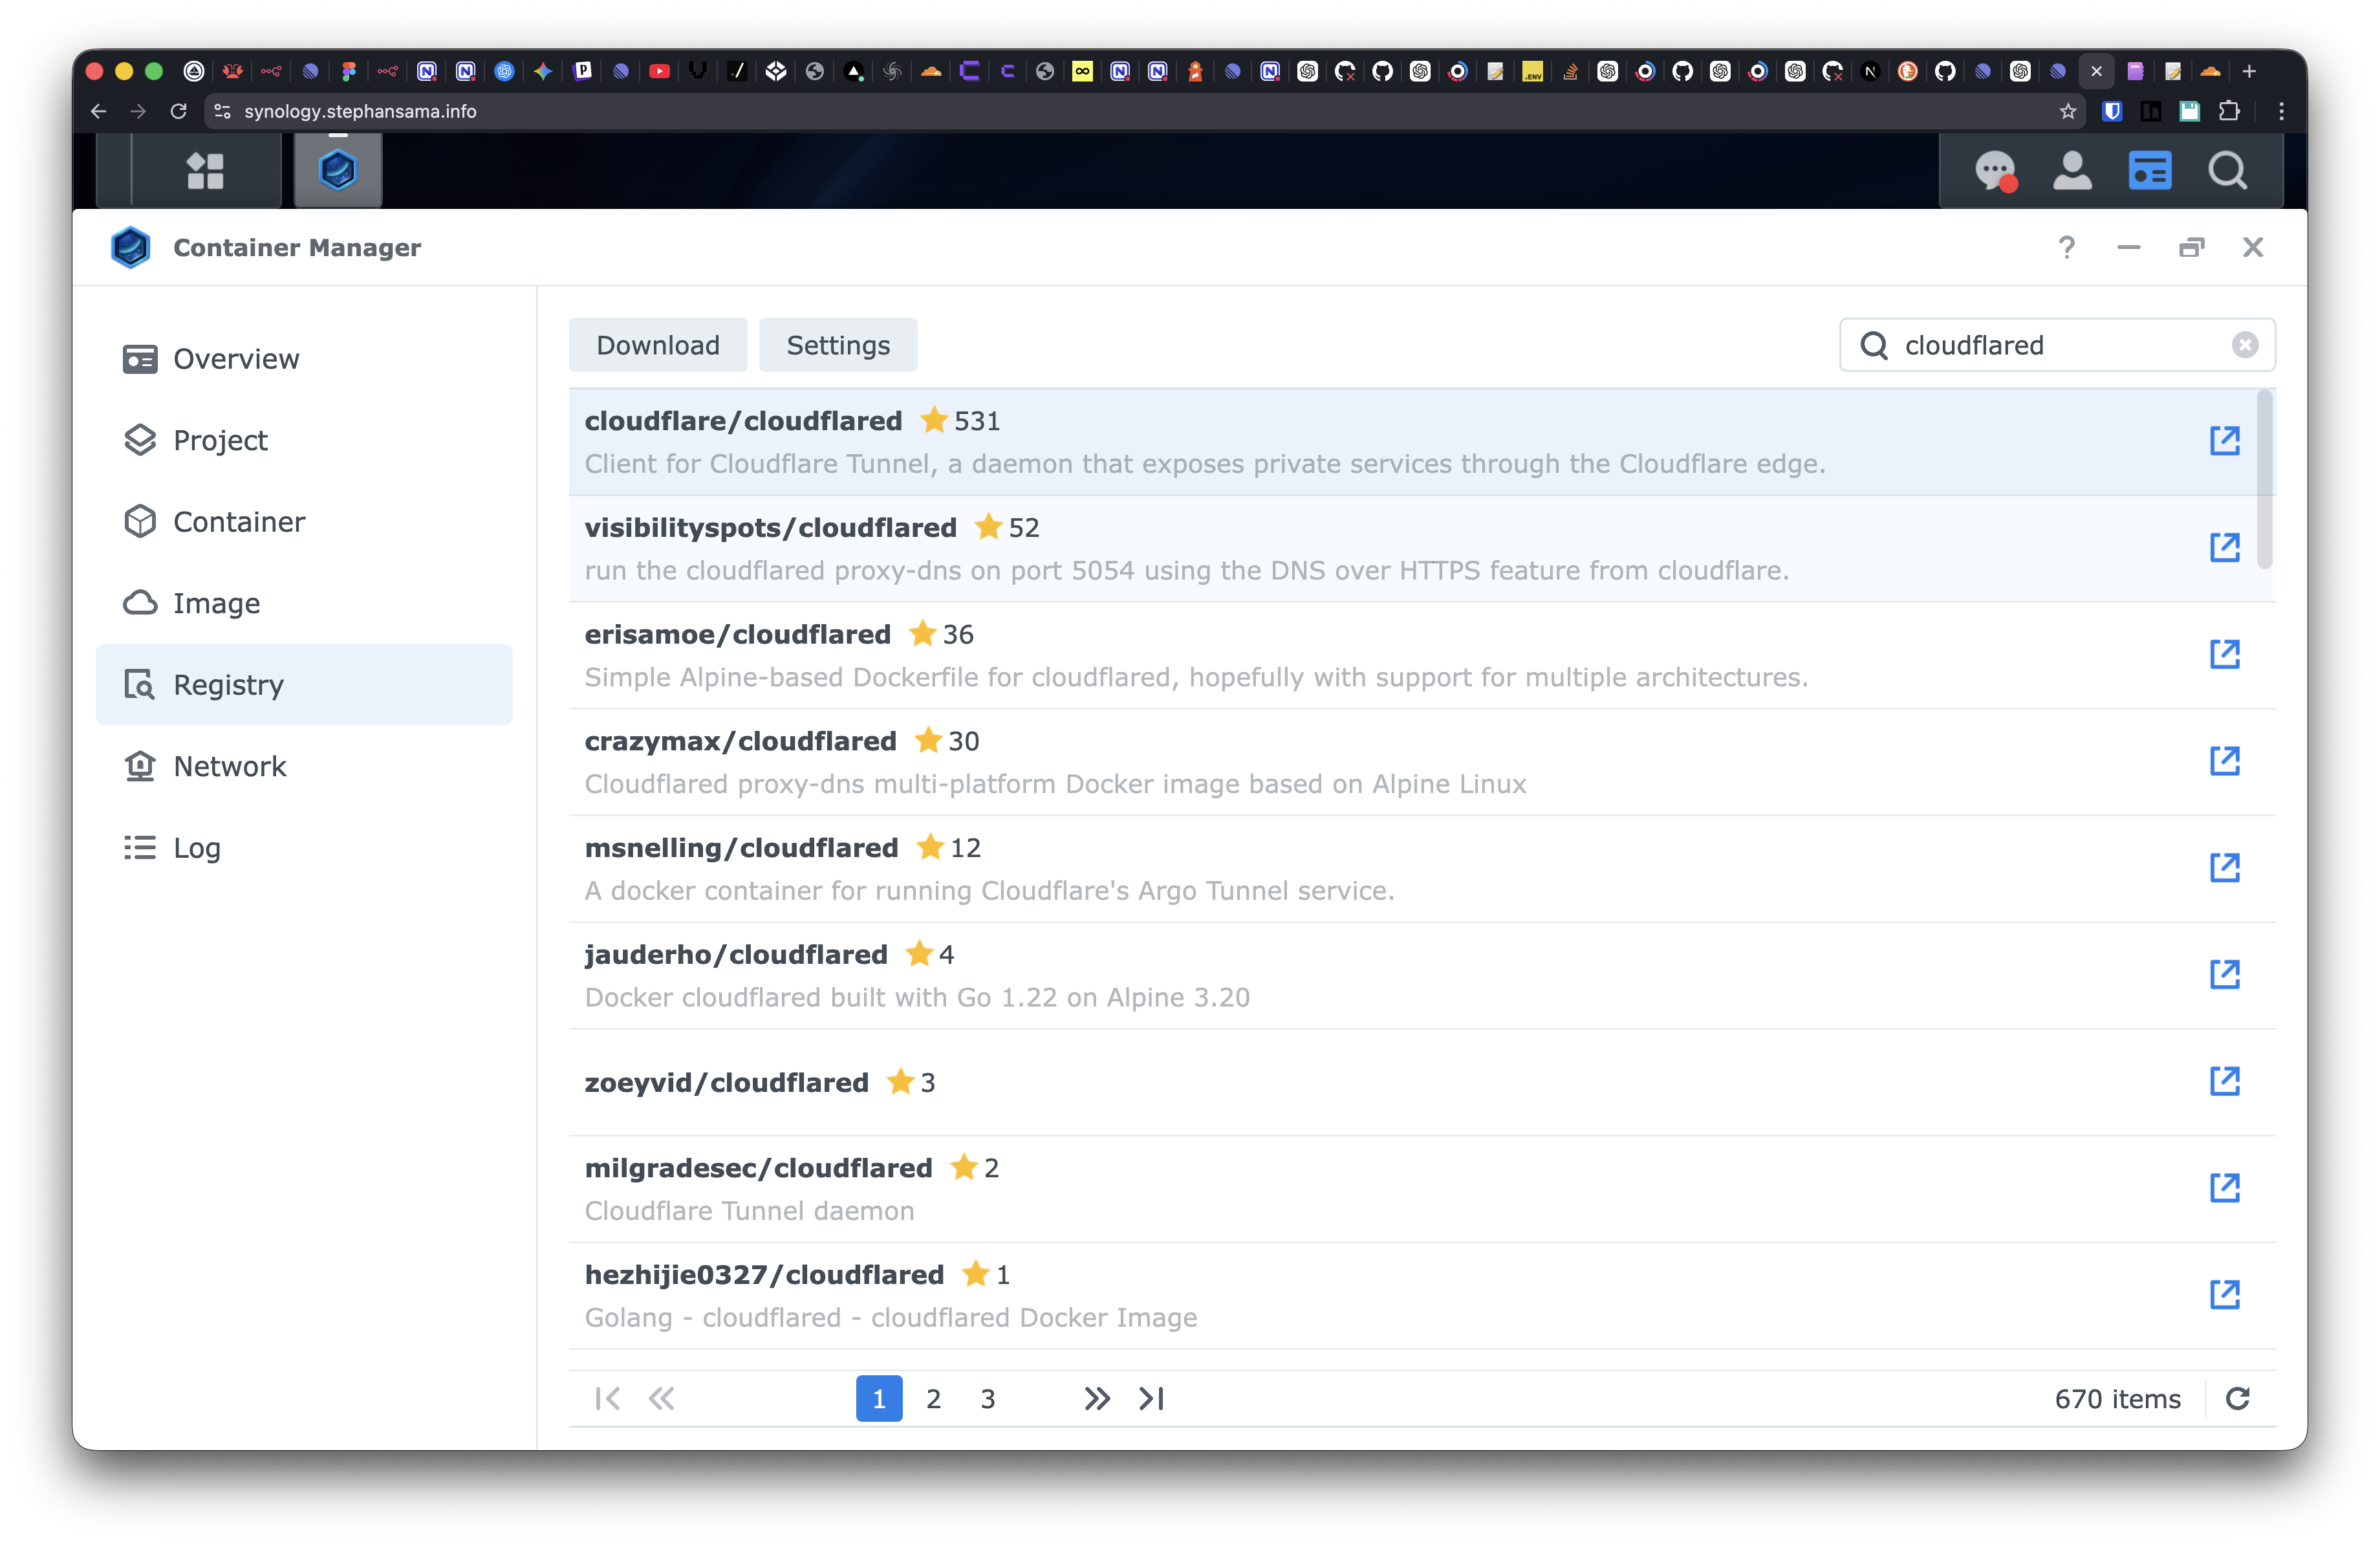
2. Download the cloudflared Image
Open Container Manager, navigate to the Registry tab, and search for cloudflared. Locate the official image (typically cloudflare/cloudflared) and click Download. Select the latest tag when prompted.
3. Create the Container
Once the download is complete, switch to the Image tab. Select cloudflare/cloudflared and click Run to launch the container creation wizard.
4. Configure Network Settings
During network configuration, select “Use the same network as Docker Host” (Host mode). This setting enables the container to communicate directly with your NAS services using localhost or the NAS’s internal IP address, removing the need for manual port mapping.
5. Set the Execution Command
Locate the Execution Command field within the General Settings or Advanced Settings section. You must replace the default command with the following, inserting your specific tunnel token:
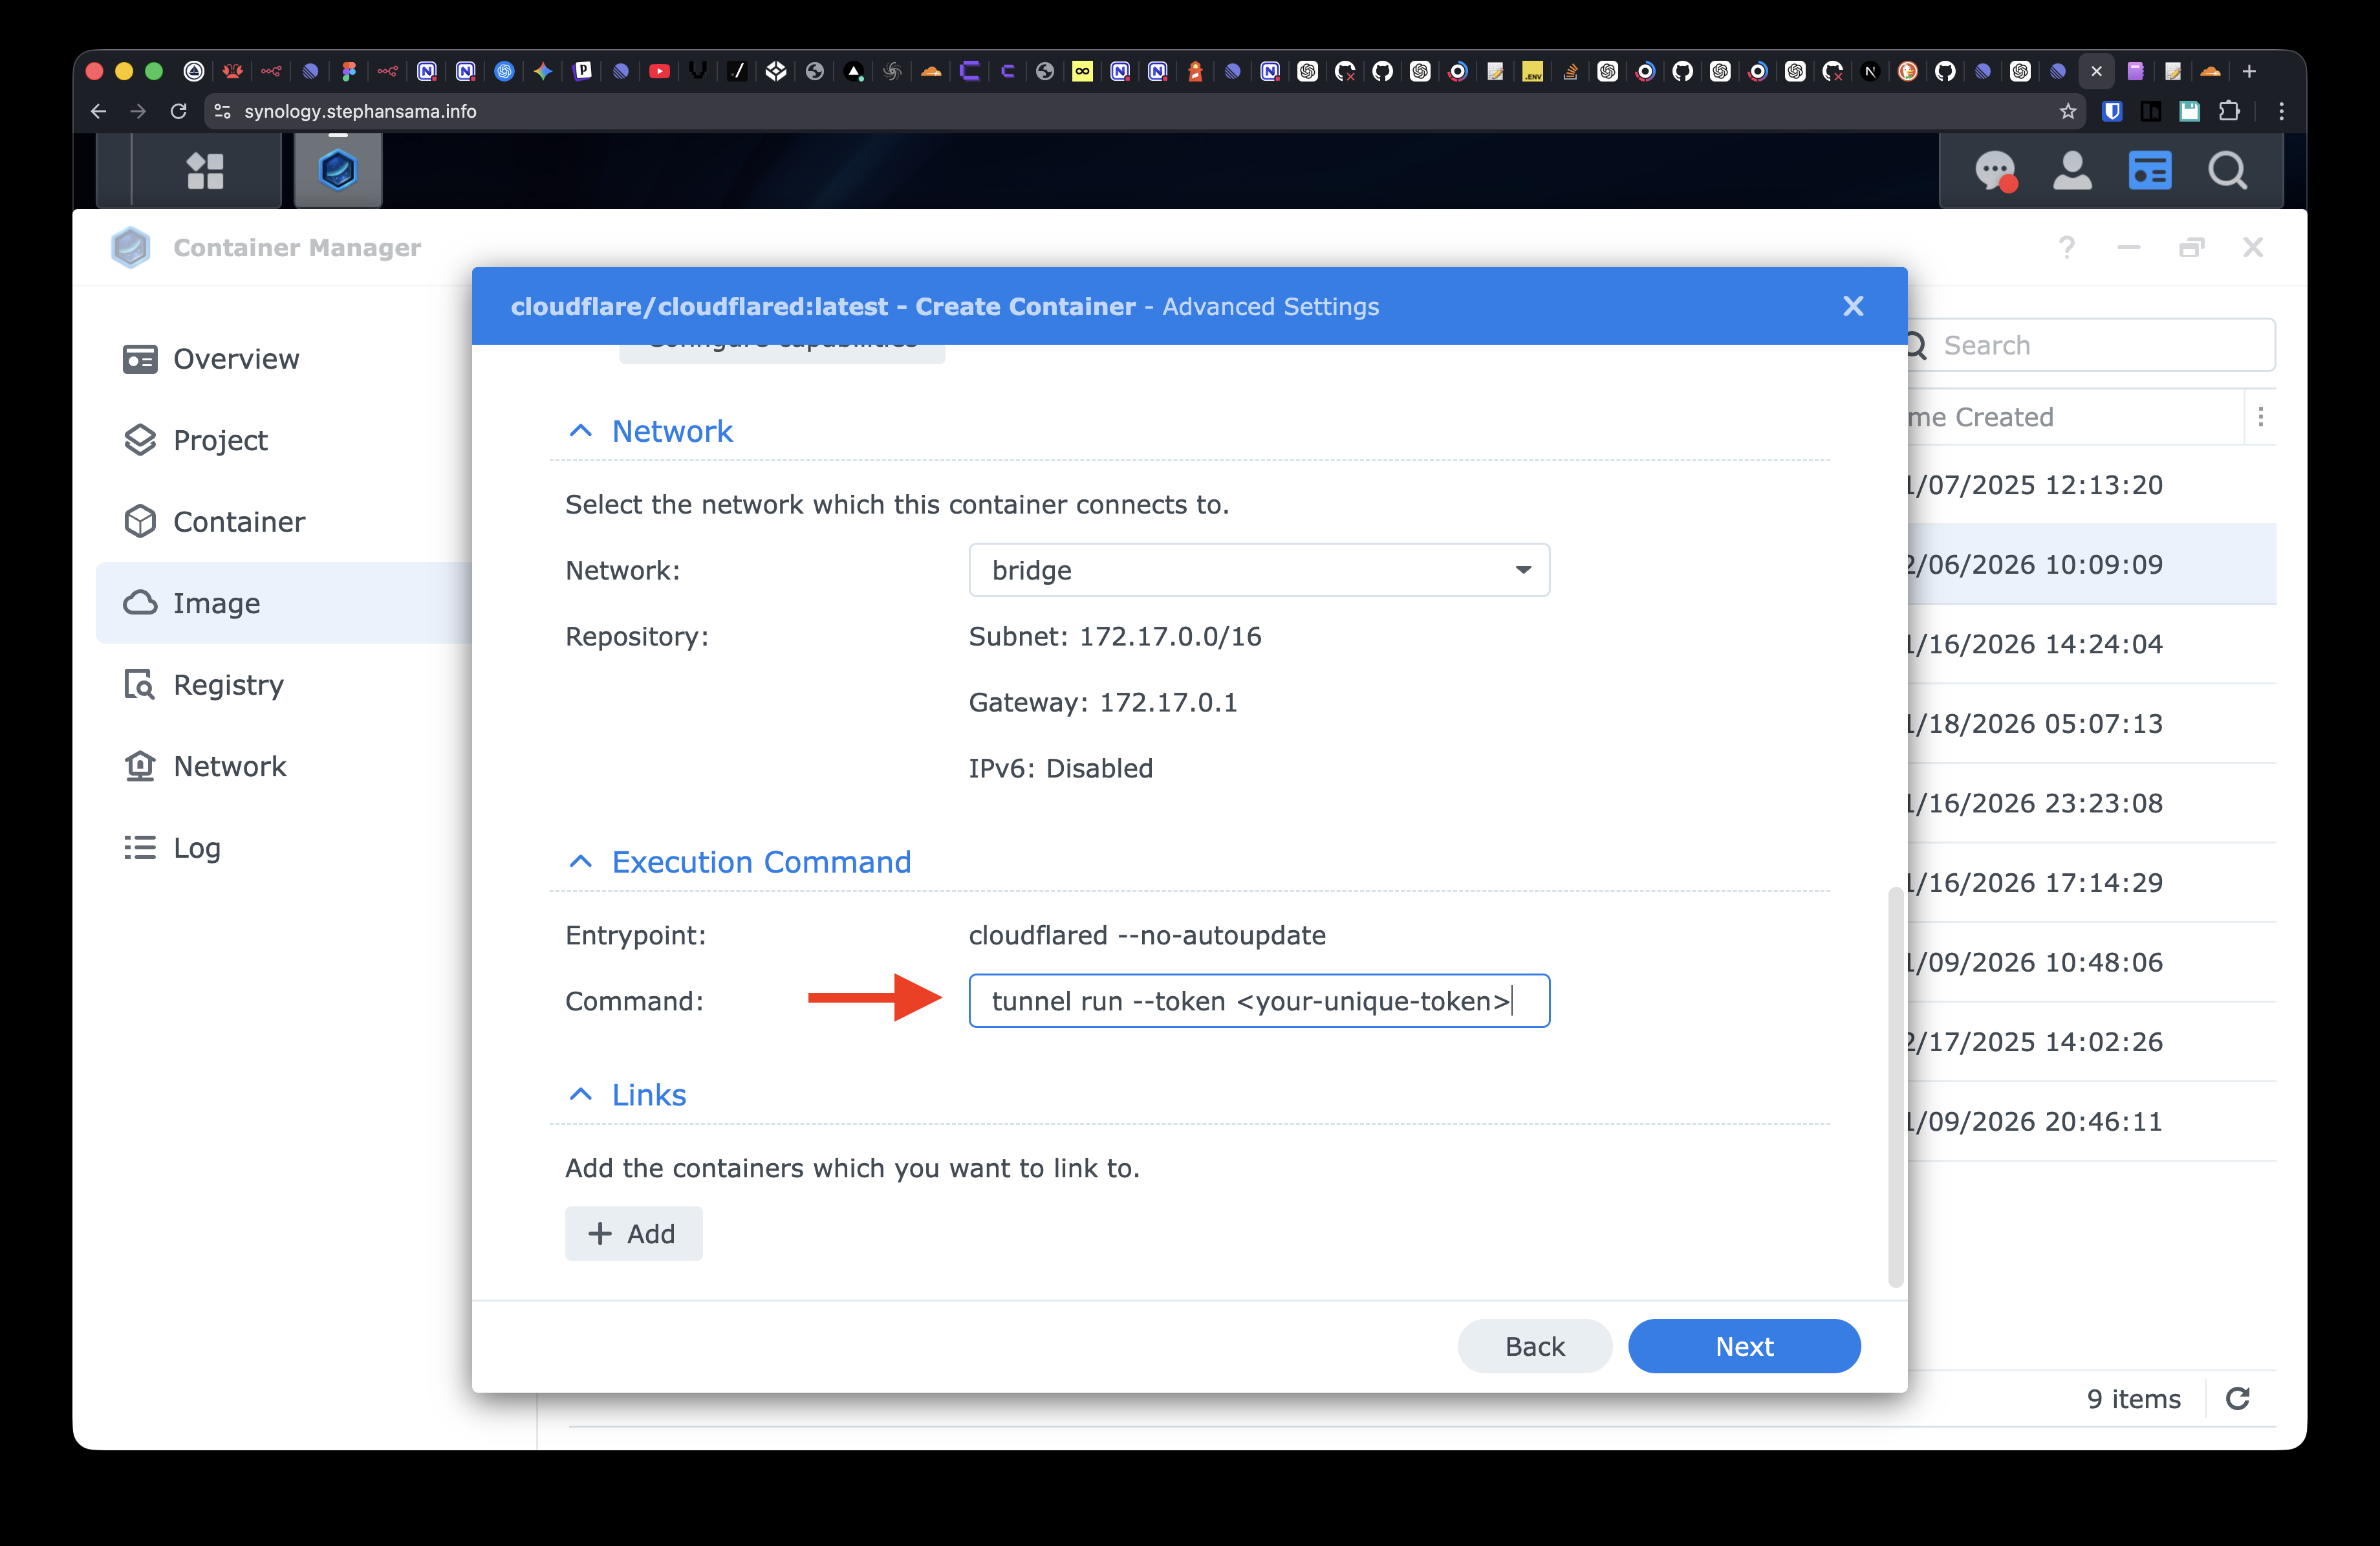
tunnel run --token <your-unique-token>NOTE
You must generate this token in your Cloudflare Zero Trust dashboard under Networks > Tunnels.
6. Route Your Services
With the container running, return to the Cloudflare Zero Trust dashboard to finalize the connection:
- Navigate to your tunnel and select Public Hostnames.
- Add a new hostname (e.g.,
nas.yourdomain.com). - Set the Service Type to
HTTPorHTTPS. - Enter your NAS’s local IP address and port in the URL field (e.g.,
192.168.1.100:5000).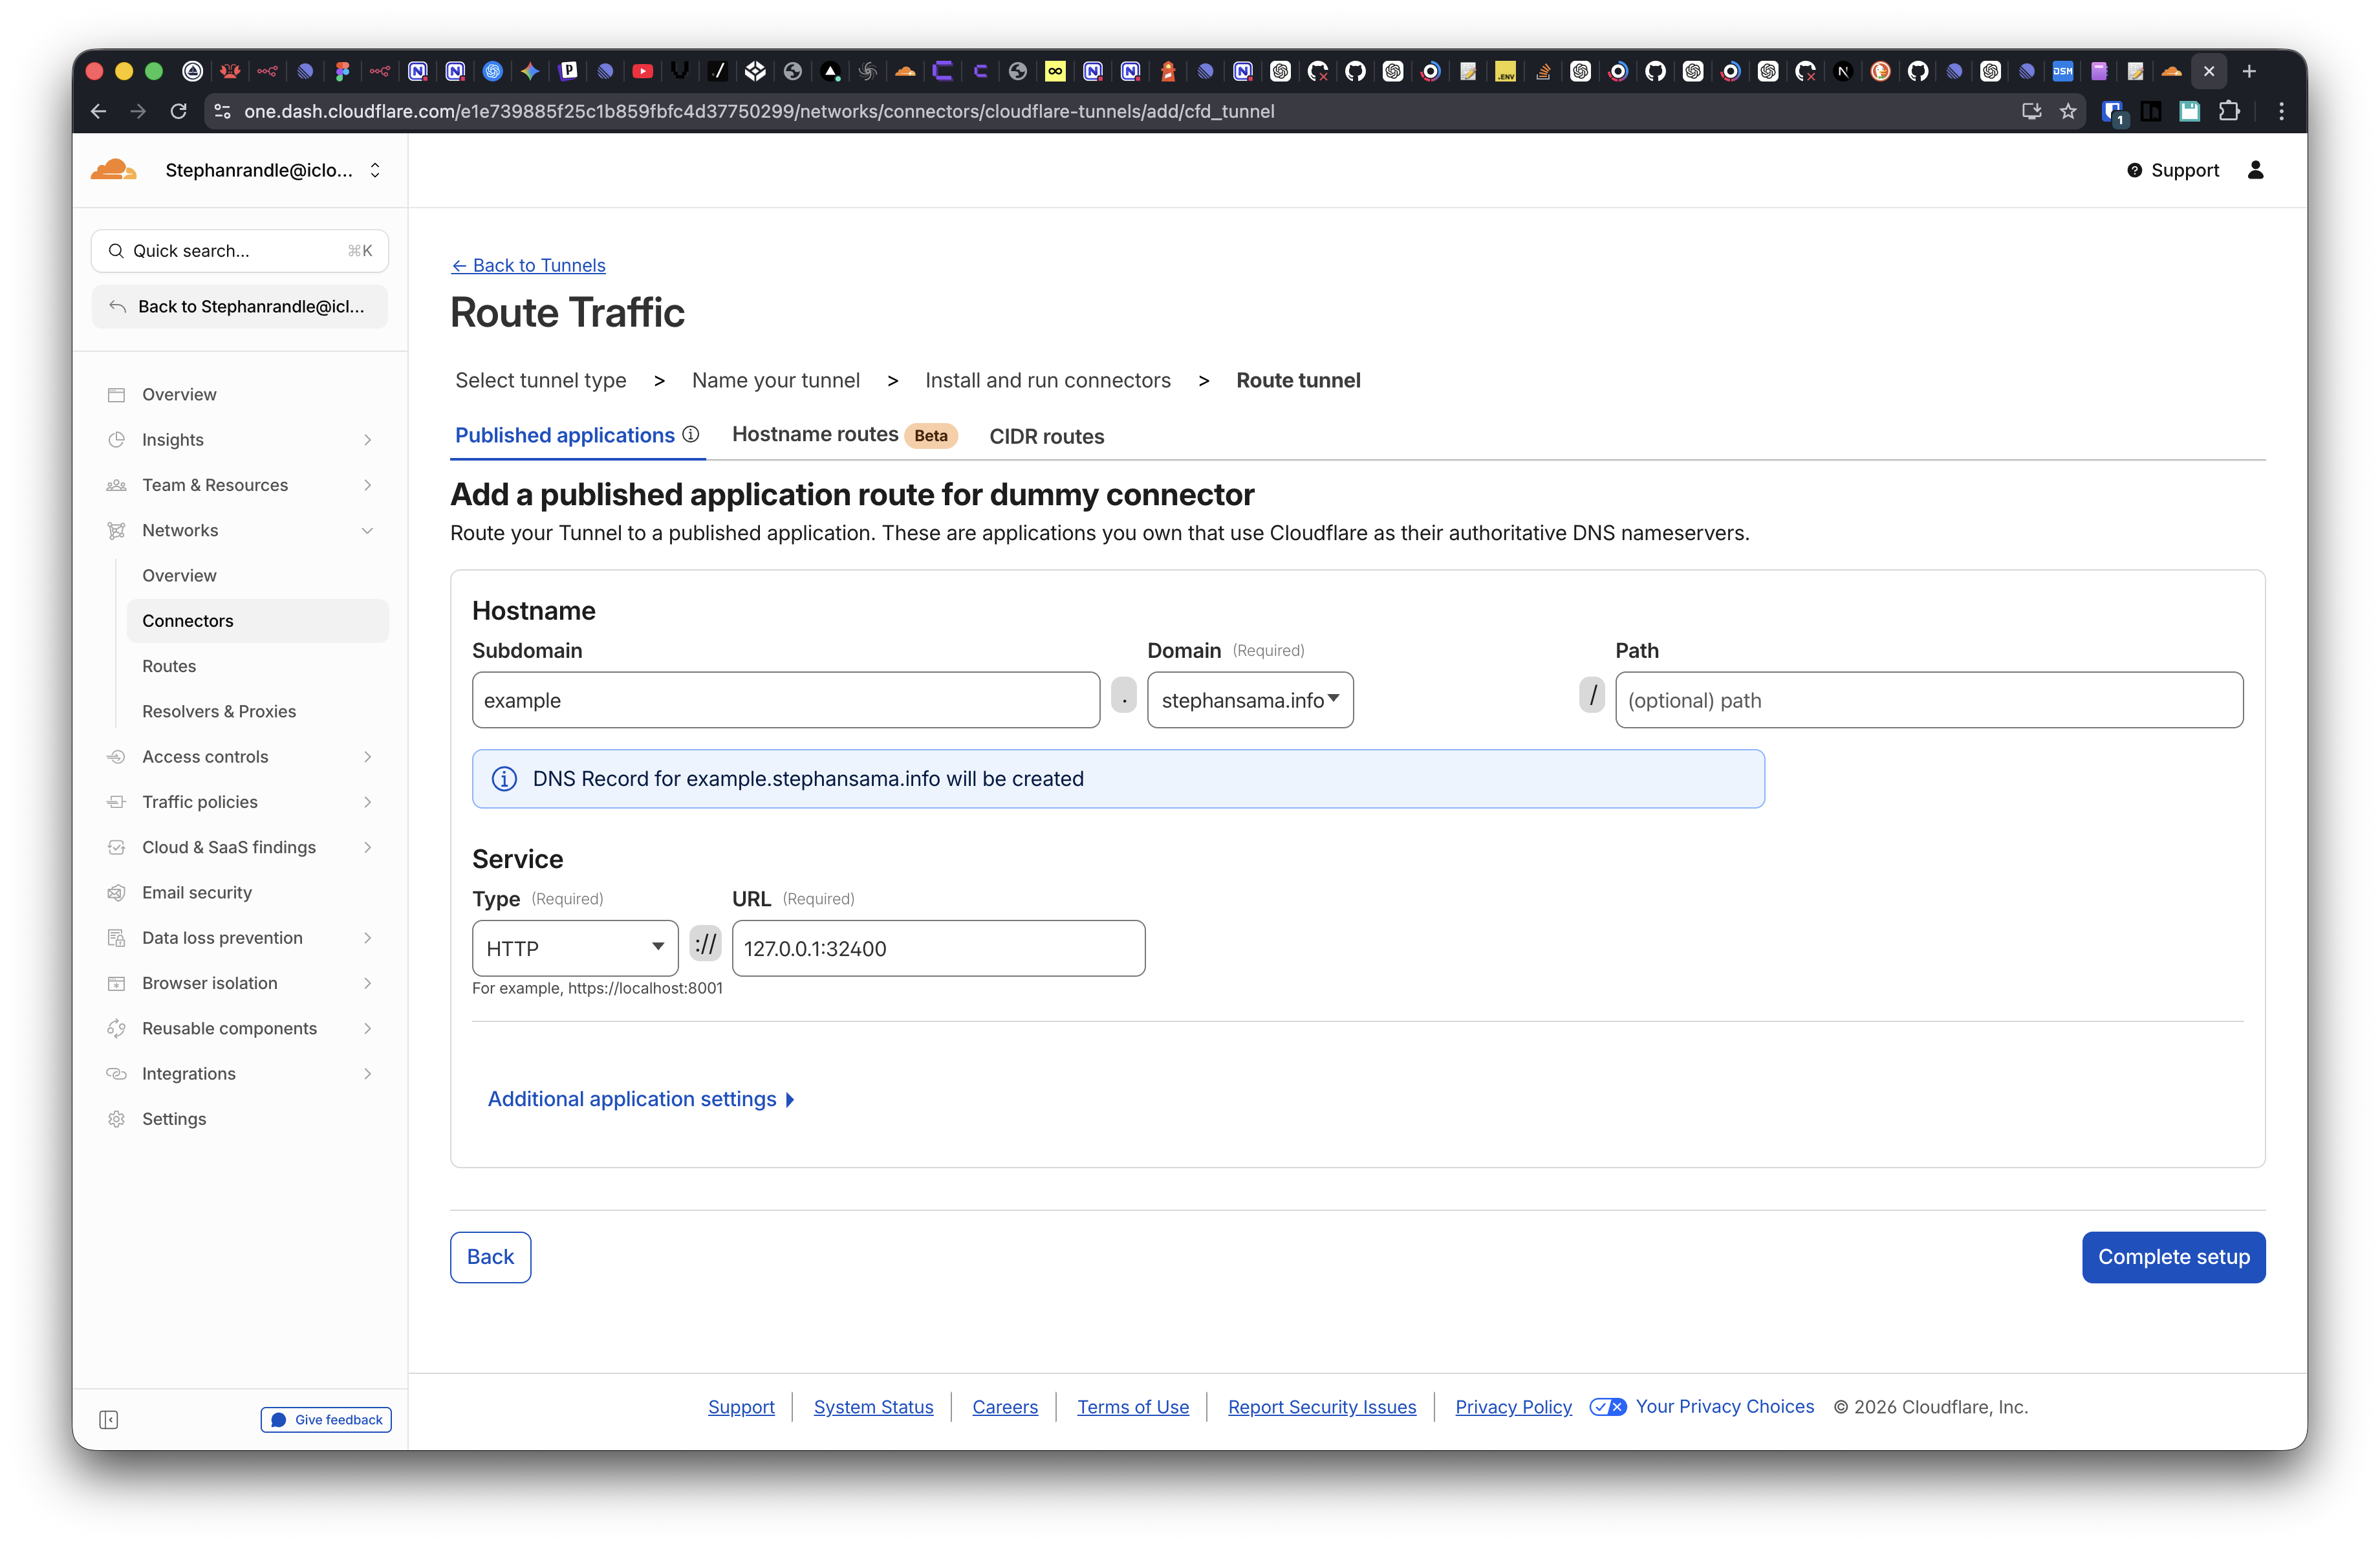
Security Best Practices
- Token Security: Treat your tunnel token with the same security as a password. Possession of this token grants connection access to your internal network.
- Access Policies: Avoid exposing services directly to the open web. Implement Cloudflare Access Policies to mandate authentication—such as email PINs, OIDC, or GitHub—before users can access the Synology login interface.
- Keep Images Updated: Periodically check Container Manager for updates to the
cloudflaredimage to ensure your setup includes the latest security patches.
References
- https://developers.cloudflare.com/cloudflare-one/networks/connectors/cloudflare-tunnel/
- https://developers.cloudflare.com/cloudflare-one/networks/connectors/cloudflare-tunnel/get-started/create-remote-tunnel/
- https://kb.synology.com/en-us/DSM/help/ContainerManager/docker_container?version=7